Exterior signage is one of the most effective ways to build visibility, reinforce brand awareness, and attract new customers to a physical location. For many businesses, your shopfront or building exterior is your first chance to grab attention, communicate a clear message, and make your business stand out from nearby competitors. That is why a proper site survey matters.
If you want signage that works, you cannot guess your way through measurements, fixings, and materials. A professional site survey is where the design process becomes practical. It is the difference between great signage that looks premium and performs around the clock, and signage that fails due to poor planning, incorrect sizes, or weak installation requirements.
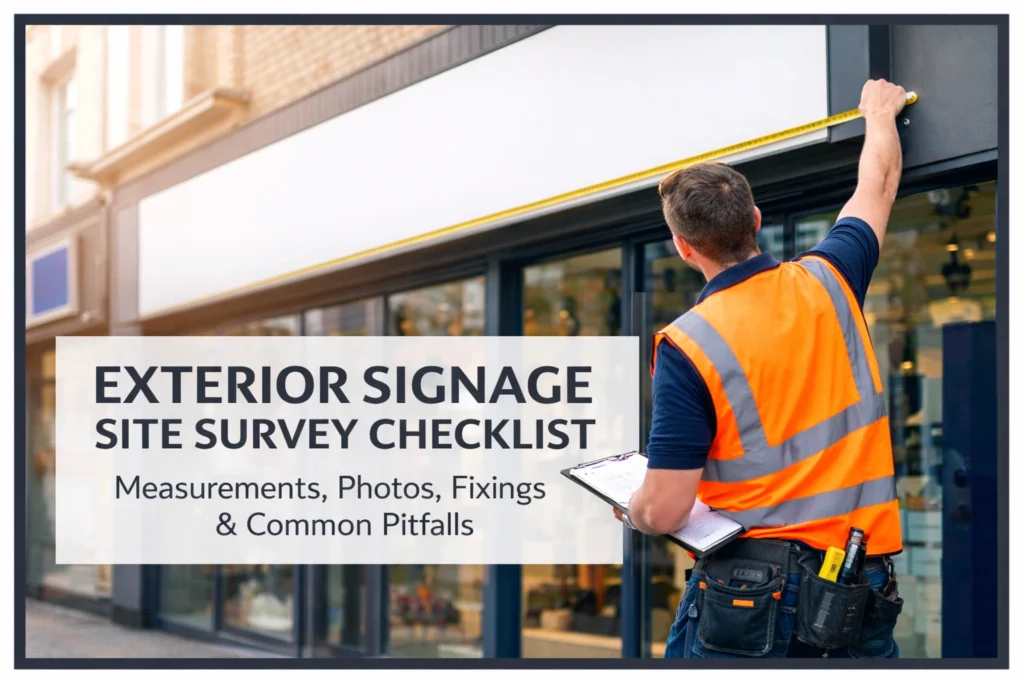
This checklist is designed to help you plan exterior signage properly, whether you are ordering exterior retail signage for a high street shopfront, installing outdoor business signs at a retail park, or planning external signage for a commercial building with directional signage needs. It covers measurements, photos, fixings, compliant signage, weather-resistant materials, and the common pitfalls that drive up the cost and delay installation.
Signage still matters in a digital world
Signage still plays a major role in marketing and advertising because it occupies real space where customers make decisions. Online ads compete for attention in a feed, but external signage competes at the exact moment someone is walking past your shopfront, driving into a retail space, or looking for your business name on a building.
That is why exterior signage remains one of the most effective investments for businesses that rely on footfall, local awareness, and location-based visibility. When done well, effective outdoor signage supports trust, improves first impression, and directs visitors to your business with clear messaging and cohesive brand presence.
Step 1: Confirm the survey goal and the type of outdoor signage
Before you take a single measurement, clarify what you are surveying for. Exterior signage can mean many different things, and the survey requirements change depending on the type.
Confirm the goal:
- New shop opening or rebrand for a shopfront
- Replacement signage for a business front
- Short-term campaigns for promotion or seasonal offers
- Permanent wayfinding to direct visitors
- Retail park visibility improvements day or night
Confirm the signage category:
- Outdoor shop signs on a fascia
- Totem signs for retail park entrances
- Pavement sign and a-boards for close-range foot traffic
- Banner installations for short-term campaigns
- Directional signs for parking, entrances, and exits
This is also where you define the difference between a sign that is purely promotional versus signage content designed for navigation, compliance, or brand awareness.
Step 2: Measurements that prevent reprints and re-installs
The most important part of any site survey is measurement accuracy. Incorrect sizes lead to delays, wasted materials, and signage that does not align with the building.
Measure the building area, not just the sign
Record:
- Total available width and height of the target area
- Any building trims, reveals, frames, or obstacles
- Window and door positions relative to the signage zone
- Height from pavement to the bottom and top of the sign area
- Projection allowance if using built-up letters or trays
If you are surveying a shopfront, measure the full shop front and then measure the usable fascia sign area separately. Many shop front signs are constrained by lighting, alarms, vents, and architectural features.
Measure viewing distance and angle
To ensure the sign can be read from a distance, note:
- Typical pedestrian viewing distance (from pavement edge)
- Vehicle viewing distance (approach lines, roads, car parks)
- Angles of approach and possible obstructions
- Whether the sign must be readable fonts from across a retail park
This influences font size, spacing, and whether signage is eye-catching enough to get noticed in a busy retail environment.
Note access for installation
Record installation height and access constraints:
- Can installers safely use ladders?
- Is a MEWP required for a large totem or high-level fascia?
- Are there time restrictions for retail parks or public spaces?
- Are there obstacles like canopy structures, parked cars, or street furniture?
Installation requirements directly affect installation cost and should be captured early to avoid surprises.

Step 3: Photos you must take on every signage survey
Photos are not optional. They protect the design process, reduce assumptions, and support compliant signage decisions.
Take these images:
- Front-on elevation shot showing the full building and shopfront.
- Angle shots from the pavement and road to show visibility and brand competition.
- Close-ups of the substrate where fixings will be installed.
- Detail shots of obstacles: lights, gutters, vents, cables, cameras, alarms.
- Pavement and surrounding area for pavement signs, a-boards, or banner frames.
For building exterior signagenage examples, designers often need context shots showing what sits to the left and right, especially in a retail space where neighbouring signage impacts visibility.
If possible, capture photos in different weather and light conditions. Even one cloudy-day photo plus a note about direct sunlight can help ensure signage that works around the clock.
Step 4: Fixings and surfaces (the part that fails most often)
Fixings are a common pitfall because different materials behave differently. An exterior signage survey must identify the surface type and the safest fixing method.
Identify the substrate
Common external signage substrates include:
- Brick and blockwork
- Rendered surfaces
- Metal cladding
- Aluminium composite panels
- Timber fascia boards
- Glazing and shop windows (for applied vinyl)
Note condition issues like cracks, loose render, damp staining, or uneven surfaces. These can affect whether the sign can be installed safely and whether additional framing is required.
Choose the right fixings for the right outdoor conditions
Even if the sign is mounted to a building, it still faces wind load, vibration, and weather-resistant demands. For effective outdoor signage, fixings must support the weight and size of the signage.
Record:
- Fixing points available
- Depth limitations
- Whether the wall is solid or cavity
- Wind exposure level, especially in retail park locations
- Whether the sign needs stand-off fixing for airflow and drainage
If you are specifying aluminium panels or built-up letters, use fixings designed for long-term performance. Poor fixings can cause movement, noise, water ingress, or premature failure.
Step 5: Materials selection and why it changes depending on location
Material choice is not just about appearance. It is about durability, maintenance, and whether the sign can stand the test of time.
Common materials available for exterior signage
- Aluminium composite panels for rigid, durable sign faces
- Acrylic lettering for premium brand presence and depth
- Vinyl graphics for cost effective messaging on windows and smooth panels
- Correx for short-term campaigns, directional signage, and temporary boards
- Banner materials for promotions, events, and external signage rollouts
For outdoor signage boards, your survey should note whether the sign will be exposed to constant wind, heavy rain, or direct sunlight. Weatherproof outdoor performance is driven by materials and finishing choices.
Weather-resistant materials and finishes
Record whether the sign needs:
- UV stable inks and laminates
- Anti-graffiti or easy-clean coatings
- Corrosion-resistant fixings
- Extra edge sealing to prevent water ingress
- Durable materials for long-term outdoor signage solutions
Effective outdoor signage is often a balance of cost effective material choices and a finish that maintains a high-quality look.
Step 6: Content checks (brand, fonts, message, visibility and what to remove)
Signage content is one of the fastest ways to lose impact. The sign can be perfectly installed but still fail if the message is unclear.
During survey, note:
- The most important message (business name, service, category)
- The brand colours and contrast against the building
- Whether the sign needs a call to action
- Whether the message needs to be concise to grab attention
Use readable fonts and confirm that type can be read from a distance. Many businesses underestimate how quickly small text disappears when viewed from a moving car or across a wide pavement.
If you want signage that works, do not overload it. Great signage usually communicates one thing clearly and supports it with cohesive brand design.
Step 7: Compliance, planning permission, and “stay compliant” checks
Compliant signage is not optional, especially for larger signs, illuminated signs, and retail park installations.
During the site survey, confirm:
- Is planning permission needed for the building or shopfront?
- Is the site in a conservation area?
- Are there landlord rules for shopfront appearance?
- Are there restrictions on illumination, size, or fixing methods?
Planning permission can impact timelines, and missing it can delay installation. If you want to stay compliant, gather evidence in the survey stage, including photos, measurements, and materials notes.
Also confirm safety and public liability considerations. For example, pavement signage must not obstruct walkways, and installers must follow safe access methods for day or night work.

Step 8: Site-specific pitfalls that drive up the cost
These are the most common survey mistakes that drive up the cost and delay projects:
- Measuring the sign area but ignoring the building edge constraints
- Not accounting for gutters, cables, or protrusions
- Using the wrong fixings for the substrate
- Ignoring wind load on banners or large totem signs
- Forgetting access restrictions for retail park installations
- Choosing materials that are not suitable for weather-resistant demands
- Designing signage content that is not readable from a distance
If you want effective signage, your survey needs to capture these risks early.
Step 9: Match the survey to the types of exterior building signage
To support types of exterior building signage, your survey notes should specify which category you are working with, because each has different requirements.
Examples include:
- Fascia sign and shop front signs
- Projecting signs for pedestrian routes
- Totem signs for retail parks and roadside visibility
- Banner frames for promotions and seasonal campaigns
- Pavement signs, a-boards, and pavement sign options
- Directional signage and directional signs to direct visitors
For exterior retail signage, shopfront constraints and brand competition are usually the deciding factors. For business signage at a retail park, distance and day or night readability dominate.
Final checks before you leave site
Before you finish the survey, confirm you have:
- Measurements of the sign area and surrounding building
- Photos showing full context and close-up substrate detail
- Notes on fixings, access, and installation requirements
- Material recommendations based on outdoor conditions
- Compliance notes to keep your signage aligned with regulations
- Guidance on readable fonts, spacing, and message clarity
This is the point where “creating outdoor signage” becomes a repeatable system. It reduces rework, supports a smooth design process, and helps ensure the sign gets noticed for the right reasons.
Exterior signage is a long-term asset. When it is planned properly, it builds brand awareness, reinforces business identity, and helps customers find you quickly. If you want signage that works, the site survey is the foundation that ensures everything else is correct.